There are more than one way to slipstream (include) Service Pack 1 into your Windows 7 installation disk - this guide describes the manual way without third party software. What you need is your Windows 7 installation disk, the Service Pack (download it from here, one of the files titled windows6.1-KB97693 depending on your architecture - save it directly to your C: drive (if you don't, you have to adjust the paths used later to your chosen directories)), and the Windows Automated Installation Kit, available here.
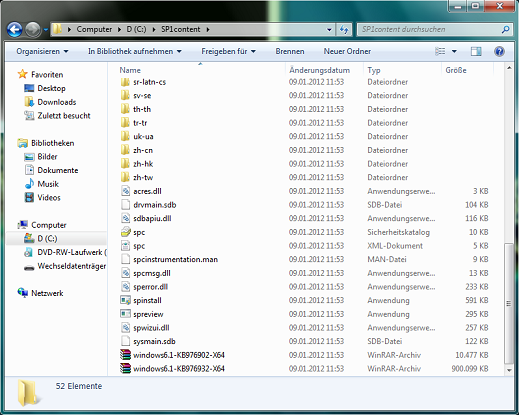
To edit the files of your installation disk, copy all of its content to your hard drive (best create a folder InstallCD on your C: drive). Afterwards open a command line window (enter CMD into the search bar) with administrative rights by right-clicking it and selecting the appropriate option (a command line window with administrative rights is also called elevated). Now you need to extract the contents of the Service Pack - therefore, create a folder called SP1content on your C: drive. Then go to the command line and enter:
C:\windows6.1-KB976932-X64.exe /X:C:\SP1content
The SP1content folder contains an item called windows6.1-KB976932-X64.cab or similar, depending on your architecture (there will be two similarly named files, pick the large one) - extract this file into the same folder. After the extraction has finished, there will be the file NestedMPPContent and seven language files called KB976933-LangsCab 0-6. Extract all of them to the same folder.
Now you have to edit three files via Editor - the first one is Windows7SP1-KB976933~31bf3856ad364e35~amd64~~6.1.1.17514 (the name might slightly differ from the file in your folder). Open it and scroll down to the last but one line. Change the "false" in allowedOffline="false" to "true", save and quit the document.
Next, open update.mum and do the exact same thing as before.
Afterwards, open update.ses. Look for the last two lines reading targetState=”Absent” and change "Absent" to "Installed".
To integrate the Service Pack to your CD, you have to know the index number of your version of Windows. To do that, you need to use one of the Windows Automated Installer Kit tools called Dism. The correct tool is located in the WAIK folders, so direct your elevated command line to it first (adjust the path to your architecture):
cd C:\Program Files\Windows AIK\Tools\amd64\Servicing
From here, you can use the dism command. To find out your version's index, you need to execute it on your Installer CD's install.wim file:
dism /get-wiminfo /wimfile:C:\InstallCD\sources\install.wim
My index for the Enterprise Edition is 1. This information is needed for the next step, which is to mount the install.wim file. Create a folder to mount in (mine is called mnt) and enter following into the elevated command prompt (replace my index with yours):
dism /mount-wim /wimfile:C:\InstallCD\sources\install.wim /index:1 /mountdir:C:\mnt
Next, we add the Service Pack's files to it (this might take a lot of time):
dism /image:C:\mnt /add-package /packagepath:C:\SP1content
Finally we unmount the image. Make sure you still use the dism.exe used before - there is another one in C:\Windows\System32 which will give you an error after the next command has run. This command might take really long:
dism /unmount-wim /mountdir:C:\mnt /commit
Afterwards you will find a new install.wim inside the SP1content directory. Pick that one and replace the original, located in C:\InstallCD\sources, with it (the new one should be a few hundred MB larger).
Now you can use a tool like ImgBurn to make a new .iso-image out of the InstallCD directory and burn it onto a DVD (you need to make it bootable - see other guides here).


