
Do you want to use a specific key on your keyboard for a different function? With the help of PowerToys, a powerful utility by Microsoft, remapping any key to another key or even a keyboard shortcut is a simple process in Windows 11. This guide will walk you through the entire process of remapping keys or shortcuts on Windows 11.
Remap Any Key or Shortcut on Windows 11
Follow this step-by-step method to remap any key or shortcut on Windows 11.
Download and Install PowerToys
First, download the latest version of PowerToys from the official Microsoft PowerToys GitHub page. Once downloaded, install it and launch the application.

Access the Keyboard Manager
After launching PowerToys, you’ll see the main dashboard divided into different sections. From the left-hand menu, select the Keyboard Manager option. Then, on the right side of the screen, click on the Remap a key button as shown below.
Remap a Key
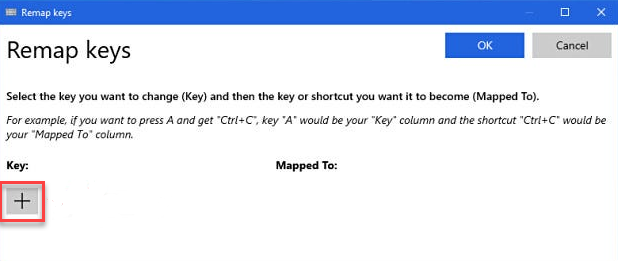
In the Remap Keyboard window that appears, click the + button to add a new key mapping.

Select the Key to Remap
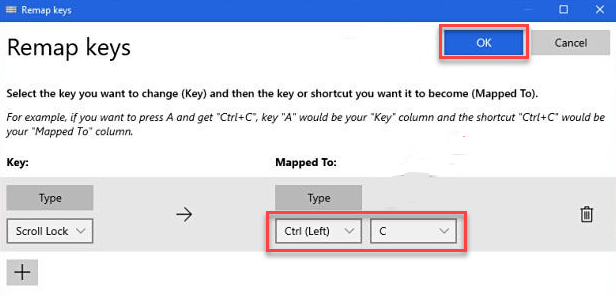
Next, specify which key you want to remap by choosing it in the Key column. You can do this by either clicking the Type button and pressing the key on your keyboard or by selecting it from the drop-down menu. For instance, if you choose Scroll Lock, it will appear in the Key column as shown below.
Assign a New Function or Shortcut
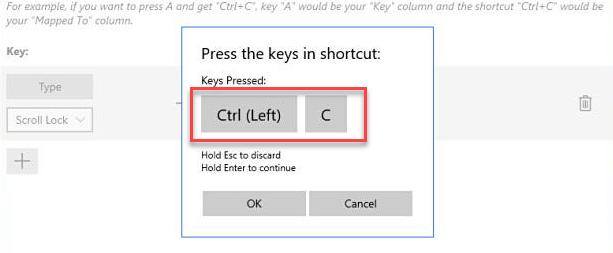
Now, select the key or shortcut you want to assign to the remapped key in the Mapped To column. For a single key, you can select it from the drop-down menu or click Type and press it on your keyboard. To assign a shortcut, click Type and then press the desired key combination (e.g., Ctrl + C for the standard Windows Copy shortcut).
Confirm Your Remapping
Once you have both the Key and Mapped To columns filled out, press the OK button.
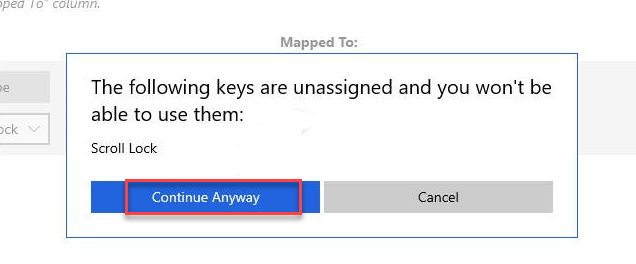
If you receive a warning indicating that one key will be left unassigned, simply click Continue Anyway to proceed.
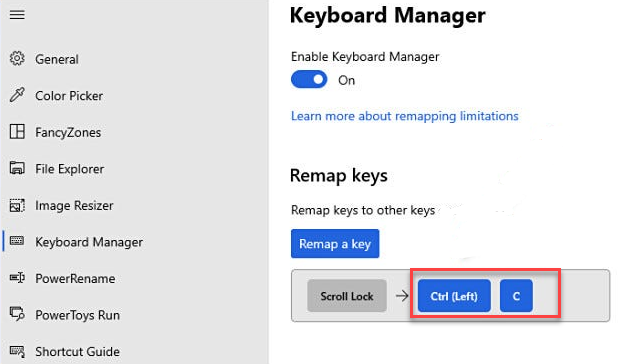
Verify the Mapping
Your custom key mapping will now appear in the Keyboard Manager configuration screen, indicating that the new configuration is active.
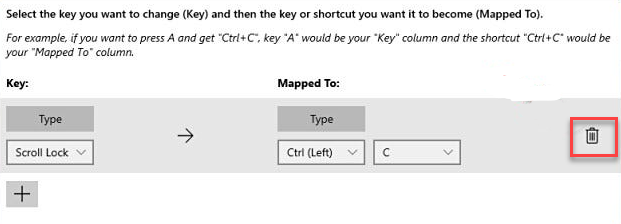
Deleting a Mapped Key
If you ever need to delete a mapped key, return to the PowerToys Settings, click on Keyboard Manager, and then Remap a key. In the list of mappings, click the Delete icon next to the mapping you wish to erase.
Confirm the deletion by pressing OK to close the window.
Conclusion
Windows 11, with the help of PowerToys, provides a simple yet powerful way to remap any key or shortcut on your keyboard. This guide has walked you through the process, ensuring you can tailor your keyboard to fit your needs. This feature is worth exploring if you’re interested in customizing your keyboard experience.